Is Applying Polyurethane Marine Paint a Challenge You Can Master?
Dreaming of that flawless, mirror-like boat finish but worried it’s out of reach for a DIY project? Don’t let uncertainty stop you from achieving professional-grade results. This guide is your key to success.
Applying polyurethane marine paint is a process that rewards precision and patience. A professional, high-gloss finish is absolutely achievable for any dedicated boat owner. This step-by-step guide will walk you through every critical stage of the process, from selecting the right paint and mastering surface preparation to perfecting the application technique and ensuring a long-lasting cure. As a Technical Consultant at JDmarine Paint, I’ll provide the expert insights you need to transform your vessel with confidence, ensuring a durable and dazzling result that rivals any professional boatyard.
![[Image Placeholder]**Image Title:** A DIY Enthusiast Proudly Beside Their Newly Painted Boat**Image Description:** A proud boat owner stands next to their vessel, which has a freshly applied, gleaming coat of high-gloss polyurethane marine paint, showcasing the achievable results of a well-done DIY project.**Prompt:** A medium shot of a proud and happy DIY boat owner, male or female, standing with a hand resting on the hull of their boat in a sunny marina. The boat's hull is flawlessly painted with a vibrant, high-gloss polyurethane marine paint, reflecting the surroundings. The owner is smiling, conveying a sense of accomplishment.](https://jdmarinepaint.com/wp-content/uploads/2025/09/a-proud-boat-owner-stands-next-to-their-vessel-which-has-a-freshly-applied-gleaming-coat-of-high-gloss-polyurethane-marine-paint-showcasing-the-achievable-results-of-a-well-done-diy-project.png "[Image Placeholder]**Image Title:** A DIY Enthusiast Proudly Beside Their Newly Painted Boat**Image Description:** A proud boat owner stands next to their vessel, which has a freshly applied, gleaming coat of high-gloss polyurethane marine paint, showcasing the achievable results of a well-done DIY project.**Prompt:** A medium shot of a proud and happy DIY boat owner, male or female, standing with a hand resting on the hull of their boat in a sunny marina. The boat's hull is flawlessly painted with a vibrant, high-gloss polyurethane marine paint, reflecting the surroundings. The owner is smiling, conveying a sense of accomplishment.")
Let’s begin by ensuring you have the right materials for the job.
Choosing the Right Polyurethane Marine Paint for Your Project?
Are you feeling stuck choosing between the different types of polyurethane marine paint? The choice between a one-part and a two-part system directly impacts the application process and the final durability of your finish.
For a DIY boat painting project, your choice will likely come down to ease of use versus ultimate performance. One-part polyurethane paints, like Pettit Easypoxy, are user-friendly as they require no mixing and cure by reacting with atmospheric moisture. They offer a great finish with good durability, making them an excellent choice for beginners or smaller projects. However, for the most resilient and professional finish, a two-part polyurethane paint is the superior option. Products like our JD908 Acrylic Polyurethane Topcoat Non-Yellowing Resistant, or other well-known marine paint brands like Awlgrip and Interlux Perfection, provide a harder, more chemically resistant, and longer-lasting finish. While they require precise mixing and have a limited working time, the results are unmatched in terms of gloss retention and durability.
With your paint choice made, let’s assemble the necessary tools and prepare your workspace.
Essential Pre-Application Steps for a Flawless Polyurethane Marine Paint Finish?
Feeling the urge to jump straight into painting? Hold on! The success of your polyurethane marine paint job is determined long before the first coat is applied. Meticulous preparation is not just a step; it’s the foundation for a durable, professional-quality finish.
Skipping proper preparation is the number one cause of paint failure, leading to issues like blistering, peeling, and poor adhesion. To achieve a flawless finish, you must start by gathering the correct tools and safety equipment, creating a controlled environment with the right temperature and humidity, and dedicating significant effort to surface preparation. This involves a rigorous process of cleaning, degreasing, sanding, repairing any imperfections in the gelcoat, and applying a compatible primer. This groundwork ensures the polyurethane marine paint has a perfectly clean, stable, and uniform surface to bond to, guaranteeing a long-lasting, beautiful result.
Let’s break down this crucial stage into manageable steps.
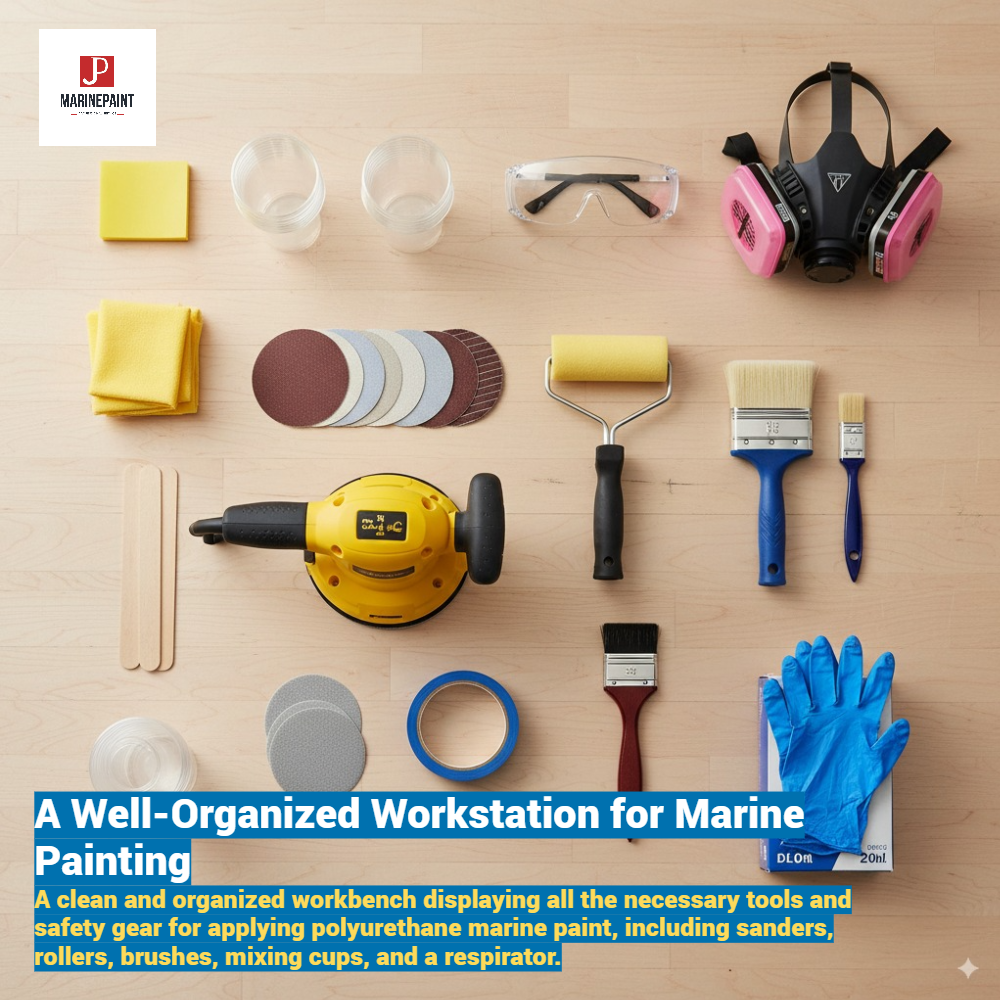
Gathering Your Polyurethane Marine Paint Tools and Safety Equipment
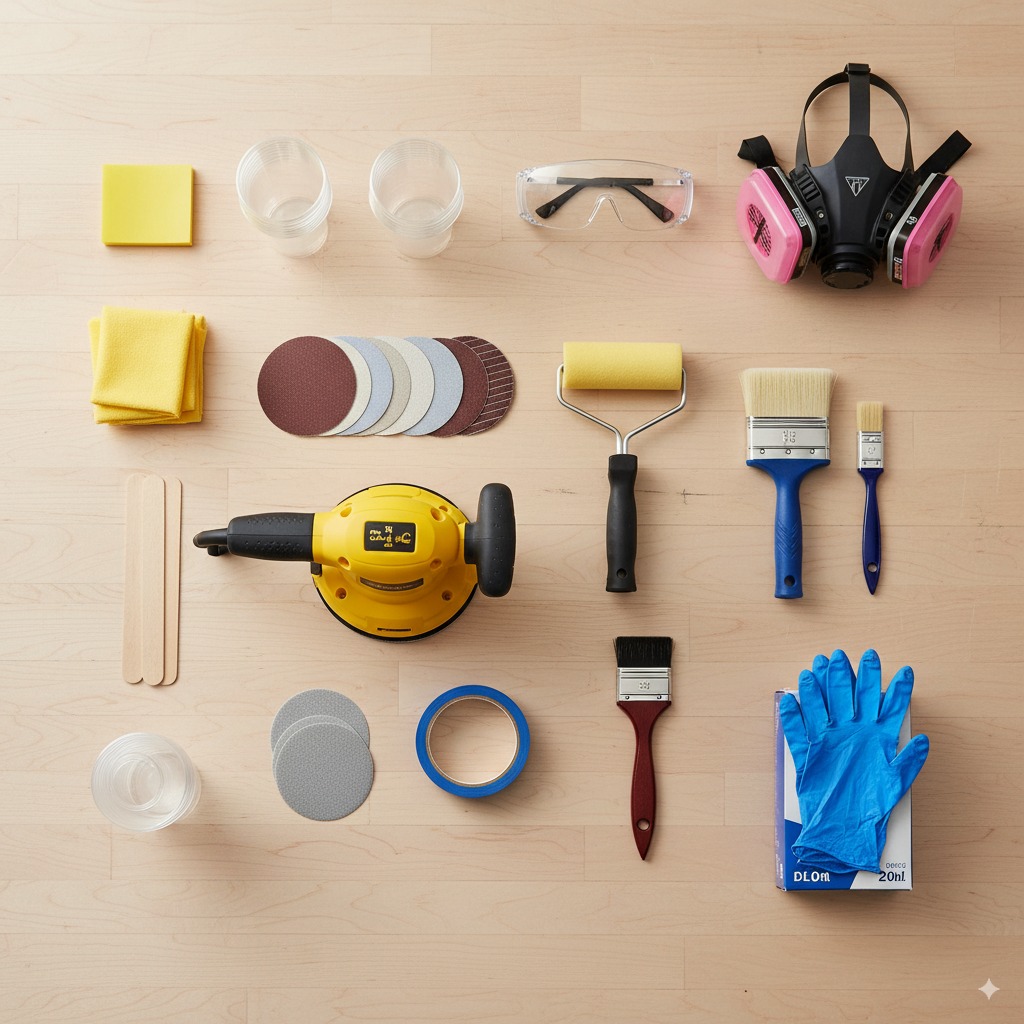
Create a checklist to ensure you have everything before you start:
- Safety Gear (Non-negotiable): Respirator with organic vapor cartridges, safety glasses/goggles, nitrile gloves, and disposable coveralls. Always consult the MSDS for marine paint for specific recommendations.
- Preparation Tools: Orbital sander, various grit sandpaper (80-320 grit), sanding blocks, scrapers, tack cloths, and marine-grade degreaser.
- Repair Materials: Marine epoxy filler or fairing compound.
- Priming & Painting Tools: High-quality foam rollers, high-quality natural bristle brushes (for tipping), painter’s tape, graduated mixing cups, and stir sticks.
- Cleaning Supplies: Acetone or a recommended solvent for wipe-downs.
Creating the Ideal Environment for Polyurethane Marine Paint Application
Your environment directly affects how the paint cures. Aim for:
- Temperature: Between 60-85°F (15-30°C). Avoid painting in direct sunlight or when temperatures are expected to drop significantly overnight.
- Humidity: Below 70% is ideal. High humidity can slow curing and affect the final gloss.
- Ventilation: Work in a well-ventilated area, like an open garage or outdoors on a calm day, to disperse fumes and aid curing. Use fans to create airflow but avoid pointing them directly at the wet surface.
Mastering Surface Preparation for Polyurethane Marine Paint
This is where 80% of your effort should go.
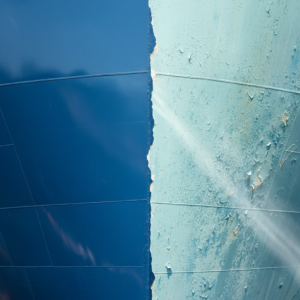
- Clean and Degrease: Wash the entire surface thoroughly with a strong boat soap and water. Follow up with a marine-grade degreaser or solvent wipe-down to remove all traces of wax, oil, and contaminants.
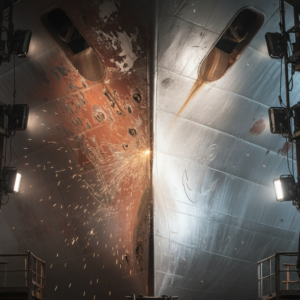
- Sand for Adhesion: Sand the entire surface to be painted. This removes the old gloss and creates a "tooth" for the new paint to grip. Use 220-320 grit sandpaper on a sound gelcoat or existing paint. If you need to remove old, failing paint, start with a coarser grit (80-120) and work your way up to a smoother finish.
- Repair and Fair: Inspect for and repair any dings, scratches, or gouges using a marine epoxy fairing compound. Apply, let it cure, and then sand it perfectly smooth and flush with the surrounding surface.
- Prime the Surface: Apply a compatible primer, especially over bare fiberglass or fairing compound. A two-part epoxy primer, such as our JDH816 Grey Epoxy Primer, is the best foundation. It seals the surface, provides excellent adhesion, and creates a uniform base for your polyurethane marine paint topcoat.
The Art of Mixing Two-Part Polyurethane Marine Paint?
Holding two separate cans of paint and catalyst can feel intimidating, but precise mixing is the secret to unlocking the incredible durability of two-part polyurethane paint. Don’t guess—measure!
Correctly mixing your two-part polyurethane marine paint is a non-negotiable step for a successful cure. This chemical reaction is what creates the incredibly hard and resilient finish. Always start by reading the manufacturer’s technical data sheet. Use graduated mixing cups to measure the base and catalyst (hardener) by volume exactly as specified. Understanding two key terms is critical: "induction time" is the short waiting period after mixing that allows the chemical reaction to begin uniformly, and "pot life" is the strict working time you have before the paint begins to harden in the pot. Adhering to these parameters ensures your paint will cure properly into a tough, long-lasting film.
Step-by-Step Mixing Instructions
- Read the Instructions: Always start with the product’s technical data sheet. It will specify the exact mix ratio (e.g., 2:1, 3:1).
- Measure Precisely: Use a graduated mixing cup. Pour in the base (Part A) to the correct mark, then add the catalyst (Part B) to the next corresponding mark.
- Mix Thoroughly: Stir the mixture slowly but thoroughly for at least two minutes, scraping the sides and bottom of the cup to ensure everything is fully incorporated.
- Respect the Induction Time: Many two-part paints require a 15-30 minute "induction" or "sweat-in" time after mixing. Do not skip this! It allows the chemical reaction to stabilize before application.
- Watch the Pot Life: Be aware of the pot life—the time you have to use the mixed paint. This can be as short as 1-2 hours in warm weather, so only mix an amount you can comfortably apply within that timeframe.
Step-by-Step Guide to Applying Polyurethane Marine Paint?
With your surface flawlessly prepared and your paint expertly mixed, are you ready to lay down that beautiful coat of polyurethane marine paint? This is the moment where technique and patience come together to create a stunning, professional-grade finish.
The application stage is where you bring all your preparation to life. The most popular and effective DIY method is "rolling and tipping," a technique that can produce a finish nearly indistinguishable from spraying when done correctly. The key is to work methodically in small sections, always maintaining a "wet edge" to prevent ugly lap marks where one painted area meets another. For those seeking the absolute best finish on a large surface, spraying is an option, though it requires more advanced equipment and experience. Regardless of the method, applying multiple thin coats with proper sanding in between is crucial for building the necessary film thickness for ultimate durability and gloss.
The "Rolling and Tipping" Method for a Spray-Like Finish
This two-person technique is perfect for DIY boat painting.
- The Roller: One person uses a high-quality, 1/4" nap foam roller to apply a thin, even coat of polyurethane marine paint to a small, manageable section (e.g., 2×2 feet). Don’t try to cover too much area at once.
- The Tipper: The second person immediately follows with a dry, high-quality natural bristle brush (a badger hair brush is excellent). Holding the brush at a 45-degree angle, use only the tips of the bristles to lightly drag across the wet paint with very gentle pressure. Use long, single strokes. This action pops any air bubbles from the roller and smooths the paint into a beautiful, flat surface.
- Maintain a Wet Edge: Overlap each new rolled section with the previous one while it is still wet. This prevents lap marks and ensures a seamless finish across the entire boat hull paint surface. Work logically from one end to the other.
Applying a Second Coat of Polyurethane Marine Paint
- Wait Time: Follow the manufacturer’s instructions for recoat time, which is typically 12-24 hours depending on conditions. The first coat should be firm but still slightly tacky.
- Sand Between Coats: For the best possible adhesion and an even smoother final finish, lightly sand the surface between each coat with 320-400 grit sandpaper. This scuffs the surface just enough for the next coat to get a strong mechanical bond. Clean thoroughly with a tack cloth before applying the next coat.
Spraying Polyurethane Marine Paint: Tips for Advanced Users
If you have an HVLP (High Volume Low Pressure) spray gun and experience, spraying provides the ultimate finish.
- Thinning: You may need to thin the paint according to the manufacturer’s guidelines for spraying.
- Technique: Apply several thin, even coats, overlapping each pass by 50%. Keep the gun at a consistent distance from the surface.
- Safety: This method atomizes the paint, making a high-quality respirator and full protective gear absolutely mandatory. Adhering to EPA regulations for marine coatings is also important.
Post-Application: Curing and Maintaining Your New Polyurethane Marine Paint Finish?
You’ve applied the final coat, and it looks fantastic! But are you tempted to rush your boat back into the water? Hold on—the work isn’t quite finished yet. Proper curing is the final, critical step to ensure your hard work translates into long-lasting durability.
Understanding the post-application phase is vital for maximizing the lifespan of your new polyurethane marine paint finish. There is a significant difference between drying time and curing time. The paint may be dry to the touch in hours, but a full cure—where the paint reaches its maximum hardness and chemical resistance—can take a week or more depending on the paint and environmental conditions. During this period, protect the finish from moisture, dirt, and impacts. Once fully cured, a simple maintenance routine of regular cleaning with pH-neutral boat soap and an occasional coat of UV-protectant wax will keep your high-gloss marine finish looking brilliant and well-protected for years to come.
FAQs: Your Polyurethane Marine Paint Application Questions Answered?
Still have a few questions before you start your polyurethane marine paint project? Getting clear answers to common concerns can boost your confidence and help you avoid simple mistakes. Here are some of the most frequently asked questions about the application process.
What happens if I don’t sand between coats of polyurethane marine paint?
If you wait too long between coats (beyond the "hot-recoat" window), the first coat will have cured too hard for the next coat to chemically bond to it. Without sanding, the second coat won’t have a mechanical "tooth" to grip, which can lead to poor adhesion and potential peeling down the line. Sanding is cheap insurance for a long-lasting bond.
Can I thin polyurethane marine paint?
Yes, but only if the manufacturer’s technical data sheet specifically allows for it and provides instructions. Thinning is sometimes necessary for spraying or to improve flow in certain temperatures. Use only the recommended thinner for your specific paint system. Using the wrong thinner can ruin the paint’s chemical balance and cause it to fail.
How do I fix runs or sags in my polyurethane marine paint?
If you catch a run while the paint is still wet, you can try to gently tip it out with your brush. If it has already started to set, it’s best to leave it. Let the paint cure completely (this might take several days), then carefully sand the run smooth with a sanding block, feathering the edges. Clean the area and reapply a thin coat of paint to the repaired spot.
How many coats of polyurethane marine paint do I need?
Generally, two to three thin coats are recommended to achieve the proper film thickness for optimal durability and UV protection. Applying one thick coat is not a substitute for multiple thin coats and often leads to runs and improper curing.
Conclusion: Achieving a Professional Finish with Polyurethane Marine Paint
By following these detailed steps—from meticulous preparation and precise mixing to patient application—you can absolutely achieve a stunning, professional-quality finish with polyurethane marine paint. Take pride in your work and enjoy your beautifully protected and restored vessel!
![]()