Epoxy vs. Polyurethane Marine Paint: A Practical Guide for Boat Owners
A fresh coat of paint is one of the most rewarding boat maintenance projects. It’s your chance to restore that showroom shine and protect your investment from the elements.
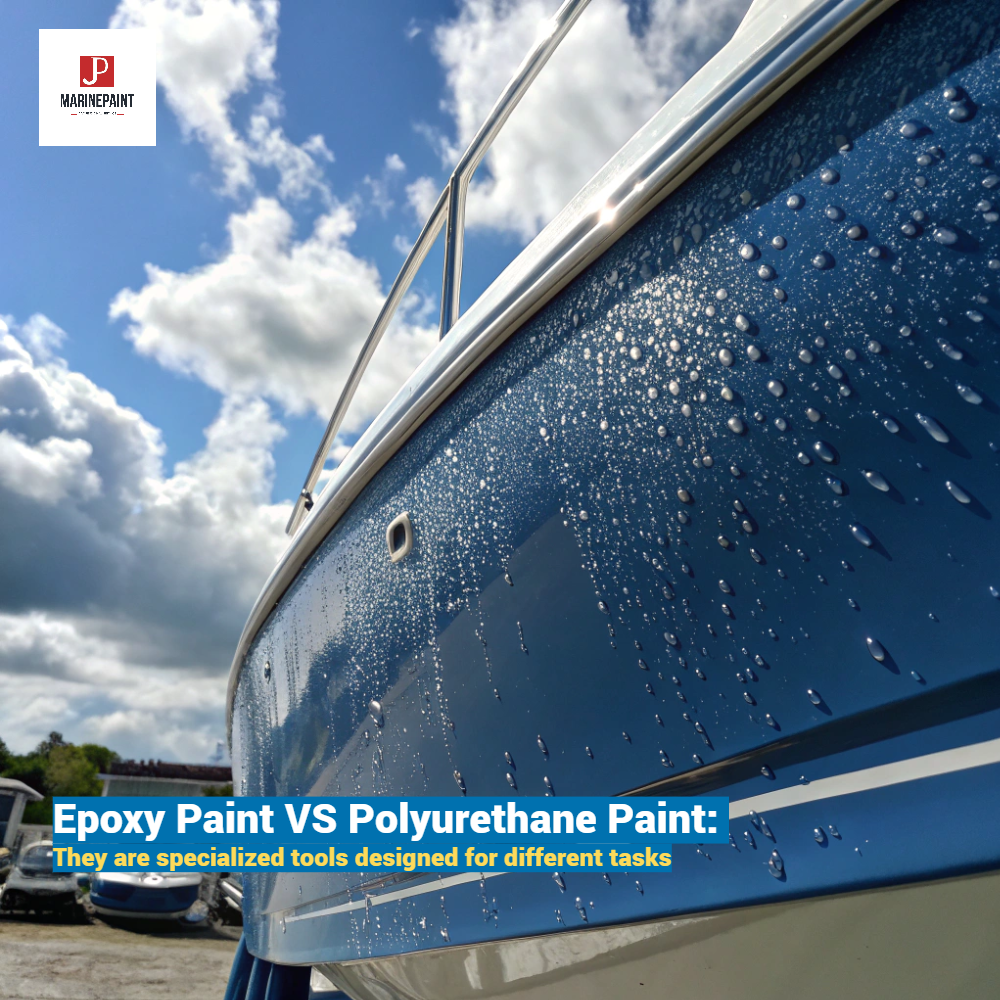
When it comes to high-performance marine coatings, the choice boils down to the epoxy vs. polyurethane marine paint system. Epoxy is the foundation—a tough, waterproof barrier ideal for priming and for use below the waterline 5. Polyurethane is the finish—a glossy, flexible topcoat with superior UV resistance, perfect for everything above the waterline [12, 27]. Understanding how to use these two paints together as a system is the key to a professional, long-lasting finish. By following a clear process, any boat owner can achieve beautiful, durable results that will protect their vessel for years to come.
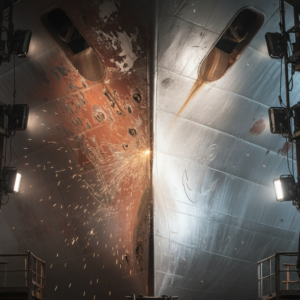
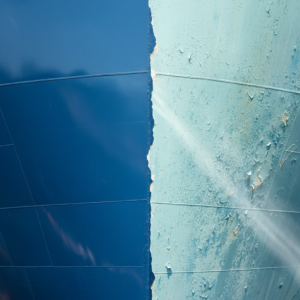
![[Image Placeholder]A split image showing the contrast between boat sections. On the left, a gleaming, high-gloss topside painted with polyurethane under the sun. On the right, a solid, protective barrier coat of epoxy being applied to the hull bottom in a workshop.](https://jdmarinepaint.com/wp-content/uploads/2025/07/a-split-image-showing-the-contrast-between-boat-se-2.png "[Image Placeholder]A split image showing the contrast between boat sections. On the left, a gleaming, high-gloss topside painted with polyurethane under the sun. On the right, a solid, protective barrier coat of epoxy being applied to the hull bottom in a workshop.")
This guide will provide a practical, step-by-step approach to choosing and using these powerful marine paints. We’ll demystify the products and walk you through the entire project, from preparation to the final polish, so you can give your boat a new lease on life.
The Basics: What You Need to Know About Epoxy and Polyurethane Marine Paint?
Thinking about your next boat painting project, you might feel stuck choosing between epoxy and polyurethane. You know you need something tough, but the technical differences can be confusing, and picking the wrong product for the job can lead to a finish that quickly fails, peels, or fades. This guide simplifies the choice. We’ll break down the specific jobs each paint is designed for, so you can confidently select the right marine coating for each part of your boat and ensure your hard work results in a durable, brilliant finish.
Understanding the core purpose of each paint type is the first step. Epoxy and polyurethane are not interchangeable; they are specialized tools designed for different tasks. One provides foundational strength and waterproofing, while the other delivers the aesthetic, UV-resistant finish.
Epoxy Marine Paint: Your Boat’s Best Defense Below the Waterline
Epoxy marine paint’s primary job is to create an incredibly hard, durable, and waterproof barrier 5. It is a two-part product, meaning a resin and a hardener are mixed to start a chemical reaction that results in a tough, non-porous film.
- Pros: Its greatest strengths are its phenomenal adhesion to fiberglass, wood, and metal, and its superior resistance to water and chemicals [2, 5]. This makes it the perfect foundational primer for the entire boat and the best possible barrier coat for below the waterline to prevent blisters. Our JDH816 Grey Epoxy Primer is a prime example of a tough, versatile foundation [4, 5].
- Cons: Epoxy’s major weakness is its poor resistance to UV radiation from the sun 15. When exposed to sunlight, it will degrade, becoming chalky and yellow over time. Therefore, it should never be used as a final finish on any surface exposed to the sun.
Polyurethane Marine Paint: The Key to a Brilliant, Long-Lasting Shine
Polyurethane marine paint is a high-performance topcoat designed to be the final, visible layer on all surfaces above the waterline. Its main function is to provide a beautiful finish that can withstand the harsh marine environment.
- Pros: Polyurethane offers excellent protection against UV damage, which prevents the color from fading and the finish from becoming dull [12, 27]. It is also highly flexible, so it can expand and contract with the boat’s surface without cracking, and it provides exceptional gloss and color retention. Our JD918 Acrylic Polyurethane Hull Paint (Yellowing resistance) is engineered for exactly this kind of lasting shine [1, 27].
- Cons: High-quality polyurethane paints are generally more expensive than epoxies. Two-part versions also require precise mixing and can be less forgiving for beginners to apply than simpler marine enamels.
The Big Decision: Where to Use Epoxy vs. Polyurethane on Your Boat?
You have your paint, but now you’re standing in front of your boat, brush in hand, wondering "what goes where?" Applying the wrong type of marine paint to a specific area is a costly and time-consuming mistake. Using a UV-sensitive epoxy on your sun-drenched deck will lead to a chalky failure, while using a polyurethane topcoat directly on a bare hull without the right primer will result in poor adhesion. The solution is to think of your boat in zones—topside and bottom—and apply a dedicated paint system to each for optimal, long-lasting protection.
The key to resolving the epoxy vs. polyurethane marine paint dilemma is to stop thinking of it as a competition. These products are designed to work together as a system, with each performing a specialized role in a specific location on your vessel.
![]()
Topside Painting: Why Polyurethane is the Clear Winner
The topsides—your hull, deck, and superstructure—are constantly exposed to sun, saltwater, and wear. This is where polyurethane shines. Its primary job is to protect the underlying primer and hull from UV degradation while providing a durable, abrasion-resistant finish that’s easy to clean [12, 27]. You have two main choices:
- One-Part Polyurethane: Easier for DIY application, it cures by reacting with moisture in the air. It offers good durability and shine.
- Two-Part Polyurethane: Products like our JD908 Acrylic Polyurethane Topcoat offer the pinnacle of performance [1, 12]. The chemical cure creates a harder, longer-lasting finish with superior gloss retention, making it the choice for professionals and those seeking the best possible result.
Bottom Painting: The Critical Role of Epoxy
Below the waterline, your boat faces a different enemy: constant immersion. The primary goal here is waterproofing, not UV resistance. This is epoxy’s domain. Applied as a thick barrier coat, an epoxy primer like our JDH819 Epoxy Zinc Phosphate Primer creates an impermeable shield that prevents water from being absorbed into the hull, which is the leading cause of osmotic blistering on fiberglass boats [4, 5, 22]. This epoxy barrier coat also serves as the perfect foundation for applying antifouling paint. The antifouling paint contains biocides to prevent marine growth, like barnacles and algae, from attaching to your hull [9, 26].
The Best of Both Worlds: The Epoxy/Polyurethane System
For the ultimate protection, professionals use a system approach [5, 12, 15]. The boat is first primed entirely with epoxy. Below the waterline, this is built up into a thick barrier coat and covered with antifouling paint. Above the waterline, the epoxy primer is lightly sanded and then top-coated with a durable polyurethane finish. This system leverages the strengths of both products for complete protection.
Gearing Up for Your Boat Painting Project?
You’re excited to start your project, but you know that success hinges on having the right tools and a safe working environment. Showing up unprepared can lead to frustrating delays, while ignoring safety can have serious health consequences. To ensure your boat painting project is smooth, efficient, and safe, it’s essential to gather all your tools and materials beforehand and to make personal protective equipment (PPE) a non-negotiable priority. This preparation sets the stage for a successful outcome.
Before the first can of paint is opened, a well-organized workspace is essential. Taking the time to gather your gear and understand the safety requirements will make the entire process more enjoyable and professional.
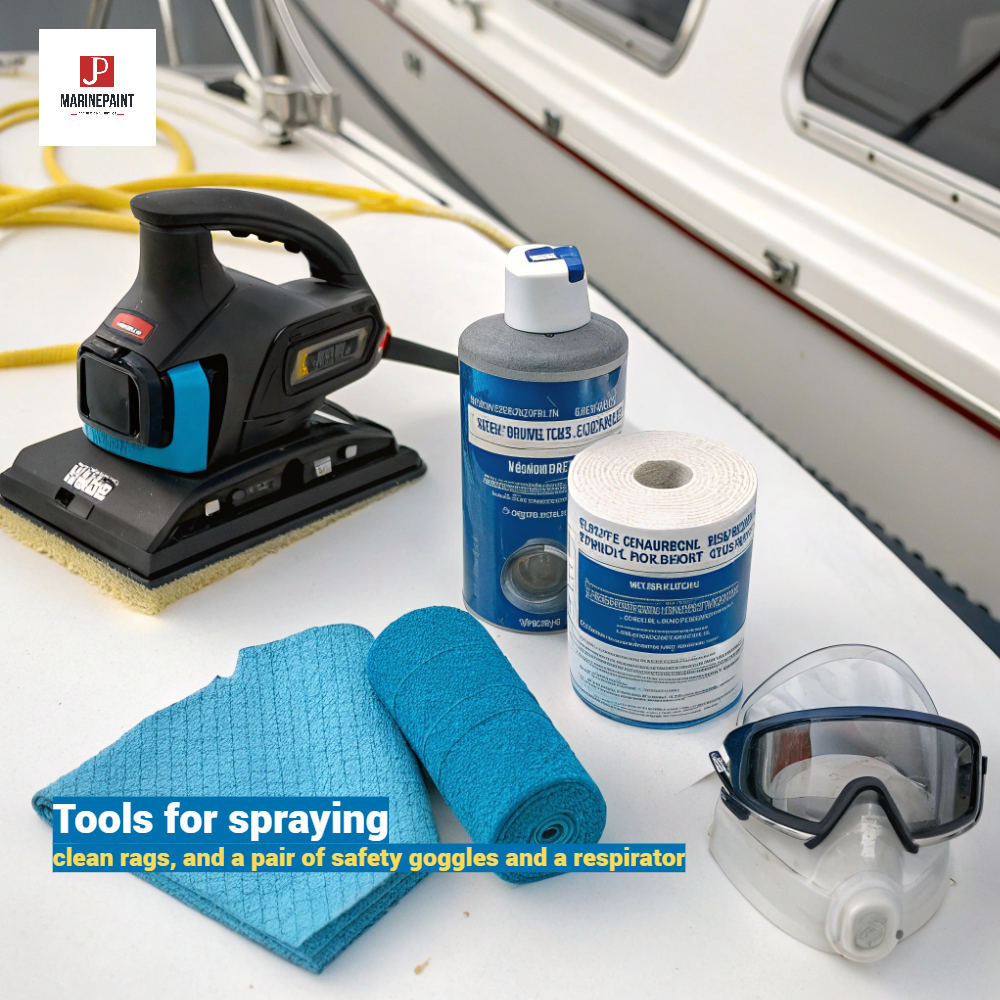
Essential Tools and Materials
Having everything on hand before you start will prevent interruptions. Here’s a basic checklist:
- Preparation: Orbital sander with 80, 120, and 220-grit discs, scrapers, clean rags, acetone or a dedicated solvent for dewaxing, and painter’s tape.
- Application: High-quality foam rollers, premium-quality paint brushes (badger hair is excellent for "tipping"), paint trays with disposable liners, and mixing cups with measurement markings.
- Protection: High-quality masking paper or plastic sheeting to protect areas you don’t want to be painted.
- Personal Protective Equipment (PPE): This is the most important category. Don’t skimp here.
Safety First: Essential Precautions for Marine Painting
Working with two-part marine paints requires strict adherence to safety protocols. The chemicals involved can be hazardous if inhaled or if they come in contact with your skin 15.
- Ventilation: Work in a well-ventilated area. If you’re indoors, use fans to create cross-ventilation and exhaust fumes outside.
- Respirator: A simple dust mask is not enough. You need a dual-cartridge respirator rated for organic vapors. Ensure it fits properly and that the cartridges are fresh.
- Gloves and Eye Protection: Wear chemical-resistant nitrile gloves and wrap-around safety glasses or goggles at all times.
- Disposal: Follow local regulations for disposing of leftover paint, solvents, and used rags. Never throw solvent-soaked rags in a pile; lay them flat to dry in a safe area to prevent spontaneous combustion.
For comprehensive information, always consult official resources on safety precautions.
The 5-Step Guide to a Perfect Marine Paint Finish?
You’ve done your research and bought the best paints, but now comes the real test: application. You’re aiming for that smooth, glossy, "just-sprayed" look, but you’re worried about ending up with brush marks, drips, and an uneven finish that screams "amateur." A poor application not only looks bad but can also compromise the paint’s protective capabilities. By following a methodical 5-step process—from meticulous preparation to the final cure—you can eliminate the guesswork and consistently achieve a flawless, professional-grade finish that you’ll be proud to show off at the dock.
This proven process breaks the project down into manageable stages. Don’t rush, and remember that patience at each step is the key to a stunning final result.
Step 1: Meticulous Surface Preparation
This is, without a doubt, the most important step in the entire process [13, 19]. A perfect paint job on a poorly prepared surface will fail every time. For an in-depth look, consult a detailed guide on surface preparation.
- Clean and Dewax: Wash the surface thoroughly with soap and water, then wipe it down with a solvent like acetone to remove any wax, oil, or polish.
- Repair: Fill any gouges or scratches with a marine-grade epoxy filler.
- Sand: Sand the entire surface to remove any shine and create a "tooth" for the primer to grip. Start with 80-grit sandpaper for rough areas and work your way up to 120 or 220-grit for a smooth finish.
- Final Clean: Vacuum all sanding dust, then wipe the surface with a clean rag and solvent. A final wipe with a tack cloth right before priming will pick up any remaining particles.
Step 2: Priming for Success
Never apply a topcoat to a bare substrate. The primer is the critical link between the surface and the finish. Apply one to two coats of a high-quality epoxy primer, such as our versatile JDH815 Iron Oxide Red Epoxy Primer or our specialized JDC53-31 Red Lead Alkyd Anti-Rust Paint for steel structures [5, 10, 17]. This seals the surface and provides a uniform base with maximum adhesion. Once the primer is fully cured, lightly sand it with 220-grit paper to create the perfect surface for your topcoat.
Step 3: Applying the Topcoat – The Roll and Tip Technique
This technique is the DIYer’s secret to a finish that rivals a professional spray job. It requires two people.
- The Roller: One person uses a high-density foam roller to apply a thin, even coat of polyurethane paint to a small, manageable section (e.g., 2×2 feet). Don’t press too hard; let the roller do the work.
- The Tipper: The second person immediately follows with a clean, high-quality brush. Holding the brush at a 45-degree angle, use only the very tips of the bristles to lightly drag across the wet paint in one direction (e.g., vertically). This smooths out the roller texture without leaving brush strokes. Overlap each section slightly and keep a "wet edge" to prevent lap marks.
Step 4: Curing and Recoating
Patience is a virtue. Follow the manufacturer’s instructions on the paint can for the minimum and maximum time to wait before applying the next coat [3, 28]. Applying a second coat too soon can cause the first coat to wrinkle. Waiting too long may require you to sand again to ensure proper adhesion.
Step 5: The Final Polish
This step is optional but can take your finish from great to spectacular. After the final coat has cured for several days, you can wet sand the surface with ultra-fine sandpaper (1000-grit or higher) and then use a machine polisher with a fine-cut compound to buff the surface to a flawless, mirror-like shine.
FAQs: Your Marine Painting Questions Answered?
Here are quick, practical answers to some of the most common questions boat owners have during a painting project.
Which marine paint is best for fiberglass boats?
The best approach is a system: use an epoxy primer as a barrier coat for ultimate waterproof protection against blisters [5, 8], then apply a two-part polyurethane topcoat for its superior gloss and UV resistance [12, 14].
Can you put polyurethane marine paint over epoxy paint?
Absolutely. This is the recommended professional system [5, 12, 15]. The epoxy primer creates the perfect adhesive foundation for the polyurethane topcoat to bond to, giving you the combined benefits of both products.
How long does marine paint last?
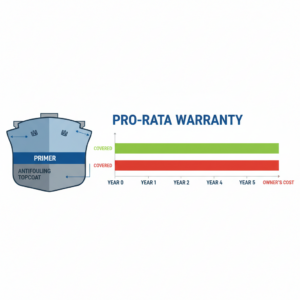
A well-applied two-part polyurethane topside finish can last 3-5 years before needing a refresh, depending on sun exposure. An epoxy barrier coat below the waterline, protected from UV, can last for 10 years or more.
Which is more waterproof, epoxy or polyurethane for my boat?
Epoxy is the superior waterproofing agent, hands down 5. Its dense, cross-linked structure is designed to be a barrier against water intrusion, which is why it’s used for priming and below-the-waterline applications.
What are the key tips for a successful DIY boat painting project?
- Don’t Rush the Prep: 90% of a great paint job is in the surface preparation [13, 19].
- Use the Right Primer: A compatible epoxy primer is the foundation of a durable finish.
- Apply Multiple Thin Coats: This is better than one thick coat. It leads to a smoother finish and proper curing.
Conclusion: Enjoying the Fruits of Your Labor
From choosing the right paint to applying that final, glossy coat, repainting your boat is a rewarding journey. The result is more than just a beautiful shine.
It’s the satisfaction of a job well done and the peace of mind that comes from knowing your vessel is protected with a durable, high-performance finish for seasons to come.
![]()