How to Apply Wear-Resistant Deck Paint: A Pro Guide
Your paint job failed, and the deck looks worse than before. Even the most advanced wear-resistant deck paint is destined to peel and blister if applied improperly, wasting both expensive materials and valuable labor.
The performance of a marine coating is determined by the quality of its application. Achieving a durable, long-lasting finish is a systematic process that relies on professional standards at every stage. It begins with meticulous surface preparation to create a clean, profiled foundation, followed by the immediate application of a suitable anti-rust primer to provide adhesion and corrosion defense. Finally, the wear-resistant deck paint topcoat must be applied using the correct techniques, under suitable weather conditions, and to the specified film thickness. Adhering to this disciplined approach is the only way to unlock the full protective potential of the coating and ensure maximum longevity for your marine assets.
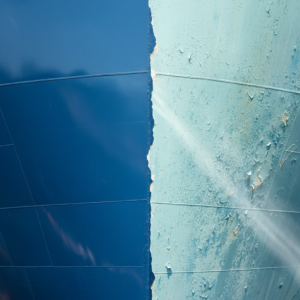
![[Image Placeholder]> Prompt: A before-and-after shot of a ship deck. The](https://jdmarinepaint.com/wp-content/uploads/2025/08/before-and-after-comparison-pictures-shot-of-a-shi-3.png "[Image Placeholder]> Prompt: A before-and-after shot of a ship deck. The")
This professional process is the key to a truly resilient finish. Let’s dive into the first and most critical stage: surface preparation.
Why is Meticulous Surface Preparation the Foundation of Deck Paint Durability?
The temptation to cut corners on surface preparation is strong, especially when schedules are tight. However, applying a fresh coat of paint over a poorly prepared deck—one with hidden salt, grease, or loose rust—is the number one cause of coating failure. This oversight traps contaminants beneath the new film, leading to blistering, peeling, and rapid undercutting corrosion. It’s an error that guarantees you will be redoing the entire job far sooner than expected, costing more time and money in the long run.
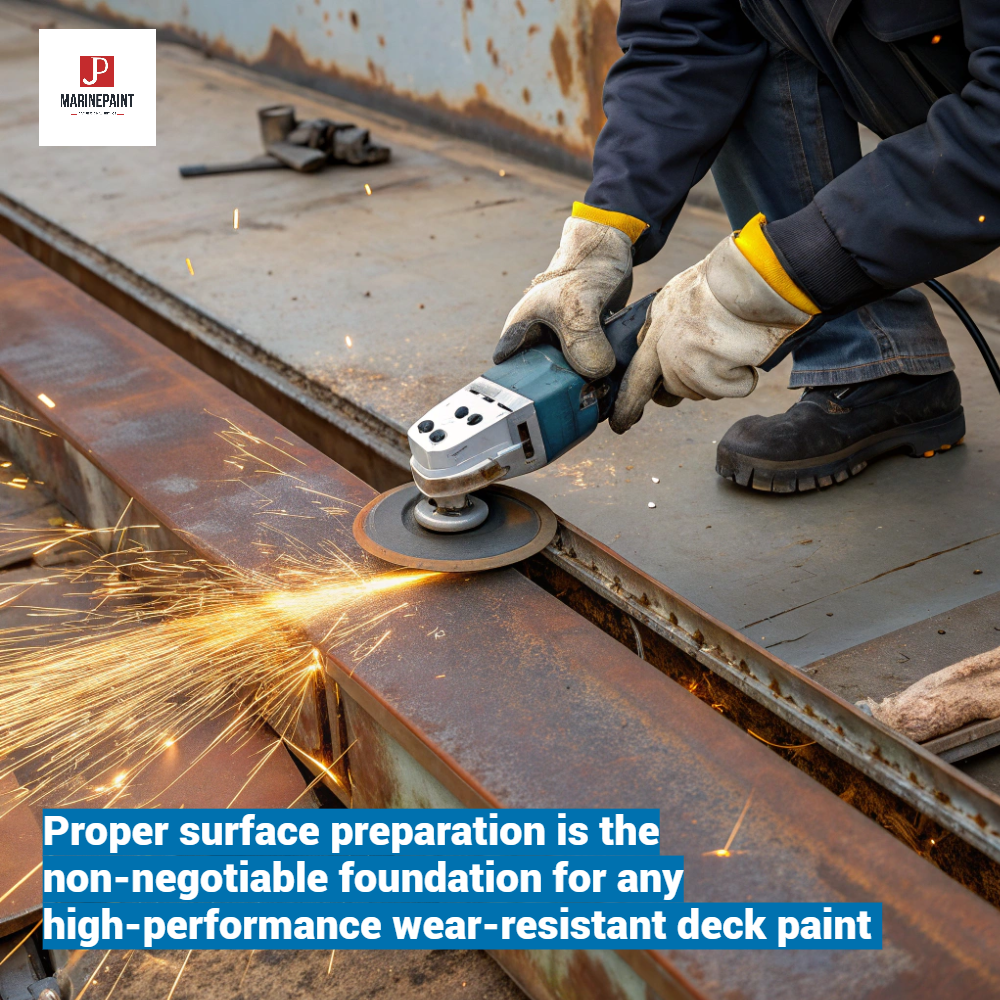
Proper surface preparation is the non-negotiable foundation for any high-performance wear-resistant deck paint. It ensures the primer and topcoat can achieve a powerful mechanical and chemical bond with the substrate. The process begins with a thorough cleaning to remove all surface contaminants. Then, all old, failing paint and rust must be completely removed to create a sound surface. Finally, the bare substrate, whether steel or wood, must be mechanically treated to create an optimal profile for the primer to grip onto. This critical groundwork is what enables the entire paint system to perform as designed and deliver long-term protection.
Once a perfectly clean and profiled substrate is achieved, you are ready for the first layer of real protection.
Creating the Perfect Canvas: A Breakdown of Preparation Standards
A successful coating application is built on a foundation of cleanliness and a proper surface profile. Follow this professional sequence for best results.
Initial Cleaning and Decontamination
The very first step is to remove all contaminants that can interfere with paint adhesion.
- High-Pressure Fresh Water Washing: This is essential for removing invisible salt crystals, which can otherwise draw moisture through the paint film and cause blistering. It also effectively removes dirt, grease, and other loose debris [1].
- Removing Old Paint and Rust: For areas with failing paint, use mechanical methods like scraping, power wire brushing, or needle hammering to remove all loose flakes and surface rust down to a firm, sound edge [2].
Preparing Bare Steel Surfaces
For exposed steel, achieving the correct industry standard is crucial. The two most common standards for marine maintenance are:
- Abrasive Blasting (Sa2.5): This is the gold standard for steel with heavy rust or mill scale [14]. Blasting removes all contaminants and etches the steel with a uniform profile, providing the best possible anchor for the primer.
- Power Tool Cleaning (St3): Where blasting isn’t feasible, using power tools like grinders or sanders to clean the steel to a bright, metallic finish is required [14]. This method is effective for removing rust and preparing surfaces that do not have heavy, pitted scale.
Preparing Wooden Decks
For wood surfaces, the goal is to create a clean and uniformly absorbent surface.
- Sanding: Thoroughly sand the wood to remove old, failed coatings and surface contaminants. This process abrades the surface, opening the wood grain to allow for deep primer penetration and excellent adhesion [1].
How Does the Right Primer Act as the Ultimate Defense for Your Deck?
After spending hours on meticulous surface preparation, the newly exposed bare steel is incredibly vulnerable. Left unprotected, it can begin to rust in as little as a few hours, a phenomenon known as "flash rusting." Painting a topcoat over this slight oxidation compromises the entire system from the start, trapping a layer of corrosion that will continue to spread beneath the paint, leading to inevitable failure. You’ve done the hardest work, only to have it undone by a moment’s delay.
A high-quality primer is your first and most critical layer of chemical protection, and it must be applied immediately after surface preparation is complete [2]. The primer’s role is twofold: it provides essential anti-corrosion defense to protect the steel, and it creates a strong adhesive bond between the substrate and the topcoat. The first coat of primer should be applied by brush or spray to ensure it fully penetrates any pits and crevices in the surface profile [19]. The type of primer must be system-compatible. For an alkyd topcoat, use a primer like JDC53-31 Red Lead Alkyd Anti-Rust Paint. For maximum longevity, a high-performance epoxy anti-rust primer will provide superior durability.
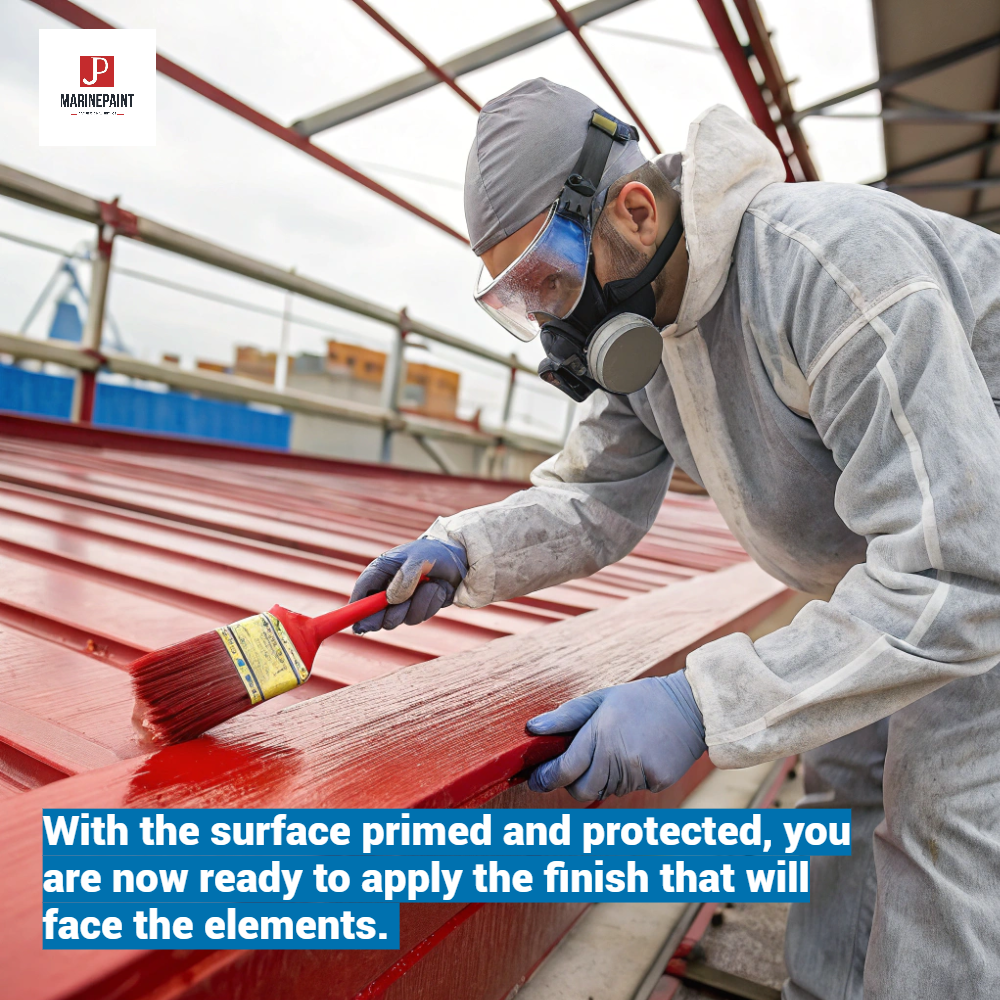
With the surface primed and protected, you are now ready to apply the finish that will face the elements.
Choosing Your First Layer of Defense
The primer choice depends on the topcoat system and the performance demands of the environment.
-
For Alkyd Systems: A compatible alkyd-based primer is essential for system integrity.
- Recommended Products: Our JDC53-31 Red Lead Alkyd Anti-Rust Paint or JDC53-37 Zinc Grey Alkyd Anti-Rust Paint are designed to create a perfect foundation for alkyd topcoats, offering excellent anti-corrosion properties and adhesion [17][27].
-
For High-Performance Systems: A two-component epoxy primer offers a significant upgrade in protection.
- Why Epoxy: Epoxy primers cure to a much harder, more impermeable film, delivering superior resistance to corrosion, abrasion, and chemicals [14]. They are the foundation of choice for systems designed for the longest service life, especially when top-coated with a durable product like an acrylic polyurethane topcoat.
What Are the Professional Techniques for Applying the Topcoat for a Flawless Finish?
You have a perfectly prepared and primed surface, but the final step can still go wrong. Applying the topcoat in poor weather, using the wrong technique, or failing to achieve the correct film thickness can ruin all your hard work. Rain or condensation can trap moisture, causing poor adhesion and a hazy finish, while improper application leads to an uneven, unprofessional look with weak spots that will fail first. This final hurdle is where professional discipline ensures the entire system delivers on its promise of durability.
Applying the wear-resistant deck paint topcoat requires attention to three key areas: conditions, technique, and film thickness. First, always verify that the primer is fully dry by respecting the manufacturer’s specified recoat interval—typically 24 hours [6]. Do not paint in the rain, in high humidity, or when surface temperatures are near the dew point, as this will trap moisture [3]. When applying, high-pressure airless spray is the best method for large areas as it delivers a consistent film [6]. For smaller jobs, a roller or brush is effective, though extra coats may be needed [6][3]. Crucially, you must achieve the correct dry film thickness (DFT), such as the 40-50μm specified for our JDC42-32 Alkyd Deck Paint, to ensure adequate protection [4].
The application is complete, but the job isn’t finished until the paint has fully cured and passed a final inspection.
Mastering the Final Coat
A flawless topcoat is the result of careful planning and execution. Keep these technical points in mind.
-
Mixing and Pot Life: Before application, stir the paint thoroughly to ensure all pigments are evenly suspended [3]. If you are using a two-component epoxy or polyurethane, mix the components precisely according to the data sheet and be mindful of the "pot life"—the limited time you have to apply the product before it begins to cure in the can [14][24].
-
Application Methods at a Glance: Method Best For Considerations High-Pressure Airless Spray Large, open deck areas. Most efficient method for achieving a specified, uniform film thickness. Requires skill and proper equipment [6]. Roller Medium-sized areas, trimming. Good for accessible areas but can introduce air into the film. May require multiple passes to build thickness [3]. Brush Small, complex areas, cut-ins. Ideal for edges, welds, and areas where spray can’t reach. Excellent for working paint into crevices, but slow for large surfaces [3]. -
Film Thickness is Critical: The durability of the coating is directly related to its thickness. Too thin, and it won’t provide enough protection. Too thick, and it may crack or fail to cure properly. Always follow the product data sheet and, if possible, use a wet film thickness gauge during application to ensure you are on track to meet the final dry film thickness specification.
Conclusion
Following these professional steps—from meticulous preparation to precise application—unlocks the full protective potential of your wear-resistant deck paint, saving time and money in the long run.
![]()