How to Apply Epoxy Marine Paint Like a Pro?
Thinking about painting your boat? Applying epoxy marine paint can seem daunting, and a single mistake could ruin the entire finish, wasting both time and expensive materials.
Learning how to apply epoxy marine paint correctly is the most critical factor in achieving a durable, long-lasting, and beautiful finish. The process boils down to five key stages: meticulous surface preparation, precise mixing of the two-part formula, proper application of primer and topcoat, and allowing for adequate drying and curing time under the right environmental conditions 113. This professional guide provides a detailed, step-by-step walkthrough of the entire epoxy paint application process, ensuring you avoid common pitfalls and achieve results that not only look fantastic but provide the ultimate protection for your vessel.
[Image Placeholder: A close-up shot of a person in protective gloves meticulously sanding a boat hull with an orbital sander. The focus is on the fine white dust and the smooth, matte surface being created, visually representing the crucial preparation stage.]
By mastering these steps, you transform the task from a source of anxiety into a rewarding project. Following this guide ensures the investment you make in high-quality marine paint pays off with years of steadfast protection and head-turning appeal.
What is the Crucial First Step in Epoxy Marine Paint Application?
Have you ever seen a boat with paint that is peeling, blistering, or flaking off? More often than not, the culprit isn’t the paint itself but a failure in the most critical stage of the entire process: surface preparation 13. Skipping or rushing this foundational step is the fastest way to guarantee that all your hard work and investment in premium materials will be wasted. A flawless, long-lasting finish doesn’t begin when you open the paint can; it begins with the diligent, methodical preparation of the surface beneath.
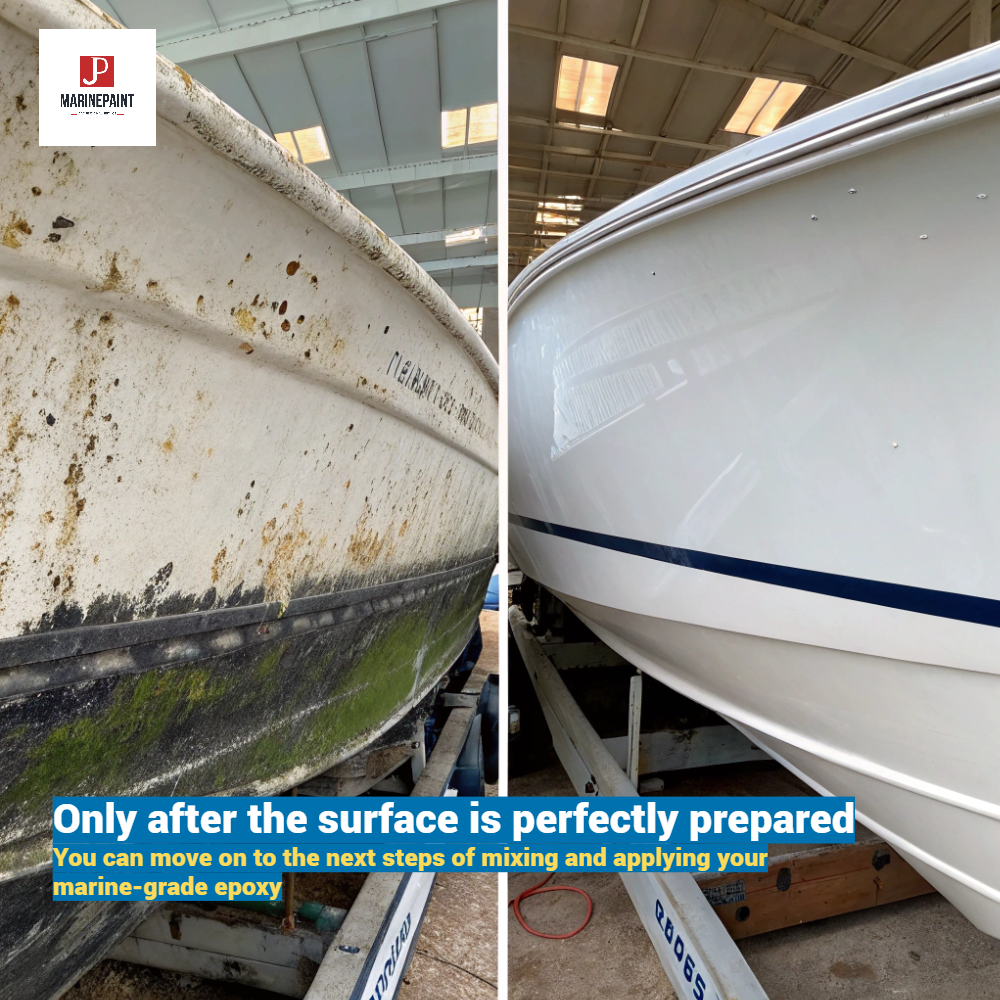
Proper surface preparation is, without question, the most important factor in determining the durability and longevity of the coating 13. Its goal is to create a clean, dry, and textured "profile" to which the paint can mechanically and chemically bond. This involves a multi-step process of thoroughly cleaning and degreasing the surface to remove all contaminants, followed by sanding or blasting to create a rough profile for adhesion 320. Any existing damage like cracks or gouges must also be repaired. Only after the surface is perfectly prepared can you move on to the next steps of mixing and applying your marine-grade epoxy.
Step 1: Cleaning and Degreasing
Before you even think about sanding, you must remove all invisible contaminants. The surface must be completely free of oil, grease, wax, salt, and other grime 23. Start by washing the entire area with a suitable detergent and fresh water. For stubborn wax or mold release agents on fiberglass, a specific dewaxing solvent may be necessary 3. After cleaning, rinse the surface thoroughly with fresh water to remove any detergent residue and allow it to dry completely 2. Painting on a surface that isn’t perfectly clean is a guarantee of adhesion failure.
Step 2: Mechanical Preparation – Sanding and Blasting
With the surface clean and dry, the next step is to create a mechanical profile for the primer to grip.
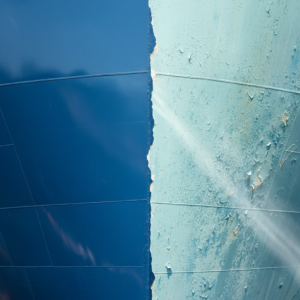
- For Fiberglass and Wood: Use sandpaper to abrade the surface. For new wood, 180-220 grit is suitable, while old paint or gelcoat may require a more aggressive 80-120 grit to start 2. The goal is to remove all gloss and create a uniform, matte finish.
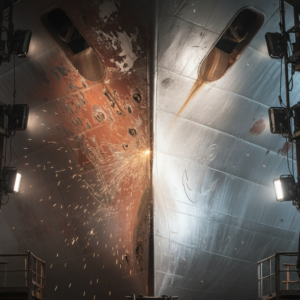
- For Steel and Aluminum: For best results, steel surfaces should be abrasive blasted to a Sa2.5 "near-white metal" standard to remove all rust and mill scale 1723. This creates the ideal profile for a high-performance primer like our JDH815 Iron Oxide Red Epoxy Primer 11. If blasting isn’t possible, grinding with a power tool to an St3 standard is an alternative 17. Aluminum should also be degreased and lightly blasted or sanded to ensure proper adhesion 3.
After sanding or blasting, it is crucial to remove all dust using a vacuum or compressed air, followed by a wipe with the appropriate solvent 3.
Step 3: Mixing Your Two-Part Epoxy Paint
This is where the chemistry happens, and precision is key. An improperly mixed epoxy will never cure correctly.
- Adhere to Ratios: Always follow the manufacturer’s specified mix ratio. For instance, our JDH835 Aluminum Iron Epoxy Anti-Rust Paint requires a precise 25:3 ratio of Part A to Part B 45. Mixing by "eye" will lead to failure.
- Induction Time ("Sweat-in"): After thoroughly mixing the two parts, many epoxies require an "induction" or "sweat-in" time. This is typically a 15-30 minute period where you let the mixture stand before application. This allows the chemical reaction to begin, which helps prevent surface bubbling 116.
- Pot Life: Once mixed, you have a limited window to use the paint before it begins to harden in the can. This is called "pot life" and it varies with temperature—the warmer it is, the shorter the pot life. For many of our epoxies, the pot life is around 4 hours at 25°C 417. Only mix an amount you can comfortably apply within this timeframe.
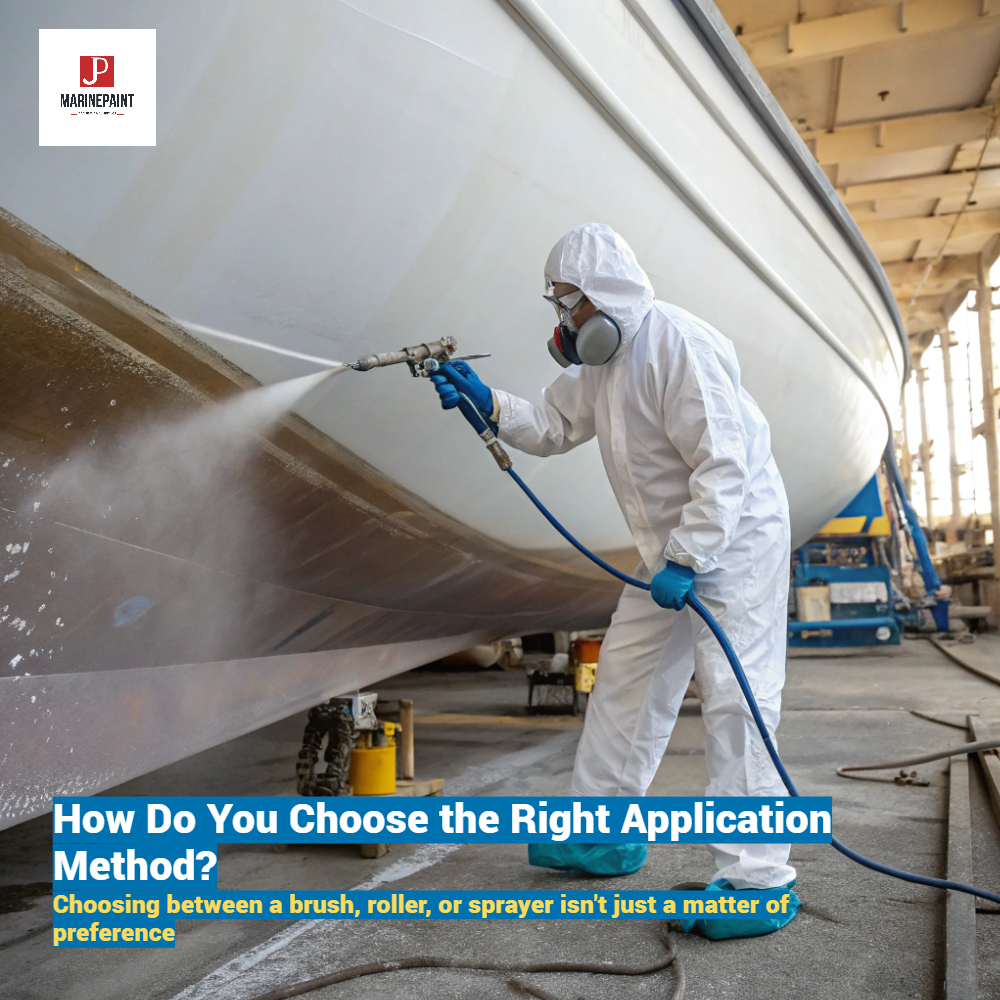
How Do You Choose the Right Application Method?
You’ve done the prep work and mixed your epoxy perfectly. Now, how do you get it onto the boat? Choosing between a brush, roller, or sprayer isn’t just a matter of preference; it can significantly impact the quality and durability of your finish. Using a roller on a first coat of primer over steel can trap air and lead to rust 13, while using a brush for a large topcoat area can result in an uneven, unprofessional look with visible brush marks. The fear of choosing the wrong tool can be paralyzing.
The best application method depends on the specific job, the type of epoxy, and the desired finish. For achieving the specified film thickness, especially with high-build coatings, airless spraying is the superior method 1. However, brushing is excellent for "cutting in" and for working primer into irregular surfaces. While rolling is fast for large areas, it’s generally not recommended for the initial primer coat on metal 13. Understanding the pros and cons of each will empower you to select the right tool for a professional-grade result every time.
The Application Process: Brush, Roller, or Spray?
Here’s a breakdown of the application process and when to use each tool:
| Method | Best For | Pro Tips | Recommended JDmarine Products |
|---|---|---|---|
| Airless Spraying | Large surfaces (hulls, decks), applying thick/high-build coatings to the correct film thickness. | This is the professional standard for efficiency and finish quality. Keep the gun 30-60 cm from the surface and maintain a consistent, overlapping pattern 17. | Ideal for primers like JDH818 Rough Surface Epoxy Primer and finishing systems 519. |
| Brushing | First coats of primer on bare metal, cutting in edges, painting small or complex areas (welds, brackets). | Use a high-quality natural bristle brush. Brushing helps to work the paint into all the tiny pits and crevices of the surface, ensuring a solid bond and preventing trapped air 13. | Excellent for applying an initial protective layer of JDC53-31 Red Lead Alkyd Anti-Rust Paint 1124. |
| Rolling | Applying subsequent coats of paint to large, flat areas where a sprayed finish is not possible. | Use a high-quality, solvent-resistant roller cover. Avoid using a roller for the first coat of primer on bare steel, as it can trap air pockets against the surface, leading to rapid rusting 13. | Suitable for applying topcoats like JD908 Acrylic Polyurethane Topcoat over a properly primed surface 1518. |
Applying the Primer and Topcoat
After selecting your tool, the sequence is critical.
- Apply the Primer: Apply one to two coats of your chosen epoxy primer, like our versatile JDH819 Epoxy Zinc Phosphate Primer 5. For underwater applications on bare steel, at least two coats are recommended 1. Pay close attention to the manufacturer’s specified dry film thickness.
- Mind the Recoat Window: This is one of the most important concepts in how to apply epoxy marine paint. To get a strong chemical bond between layers, you must apply the next coat when the previous coat is still slightly tacky but not fully cured 6. This "recoat window" varies by product and temperature. For example, many of our epoxies have a 24-hour recoat interval at standard temperatures 41718. If you miss this window, you must sand the surface again to create a mechanical profile for the next coat to adhere to 6.
- Apply the Topcoat: Once the primer has reached its recoat window, apply your final topcoat, such as a durable polyurethane, which provides UV resistance and a high-gloss finish 18.
Drying and Curing Times
Patience is a virtue. While the paint may feel dry to the touch in a matter of hours, achieving a full cure takes much longer.
- Drying: This refers to the initial hardening where the surface is no longer tacky. "Touch dry" can be as fast as an hour, while "hard dry" might take 24 hours 417.
- Curing: This is the full chemical cross-linking process, which can take up to 7 days or more depending on the product, temperature, and humidity 16. Do not subject the new paint job to heavy use or submerge it before it has fully cured according to the manufacturer’s instructions. Always work in a dry, well-ventilated area and never paint if rain is expected or if the surface temperature is less than 3°C above the dew point, to avoid condensation 1.
What Are the Top Brands and Products in the Epoxy Marine Paint Market?
With so many options on the market, how do you choose the right brand? It’s easy to get lost in a sea of marketing claims, leaving you unsure if you’re buying a genuinely high-performance product or just clever packaging. You need a reliable system from a company that understands the demanding marine environment, but it can be difficult to distinguish between consumer-grade products and true professional-quality coatings.
While many reputable brands like Interlux, Pettit, and Rust-Oleum Marine offer quality products for the DIY boater, professionals often look for manufacturers that provide a complete, integrated system designed for superior performance and longevity. At JDmarine Paint Co., Ltd, we focus on developing high-performance marine coatings engineered as a complete system 4. From specialized primers to durable topcoats, our products are formulated to work together, providing a synergistic layer of protection that stands up to the harshest conditions. Our focus is on providing robust, reliable solutions for every part of the vessel, ensuring professional results.
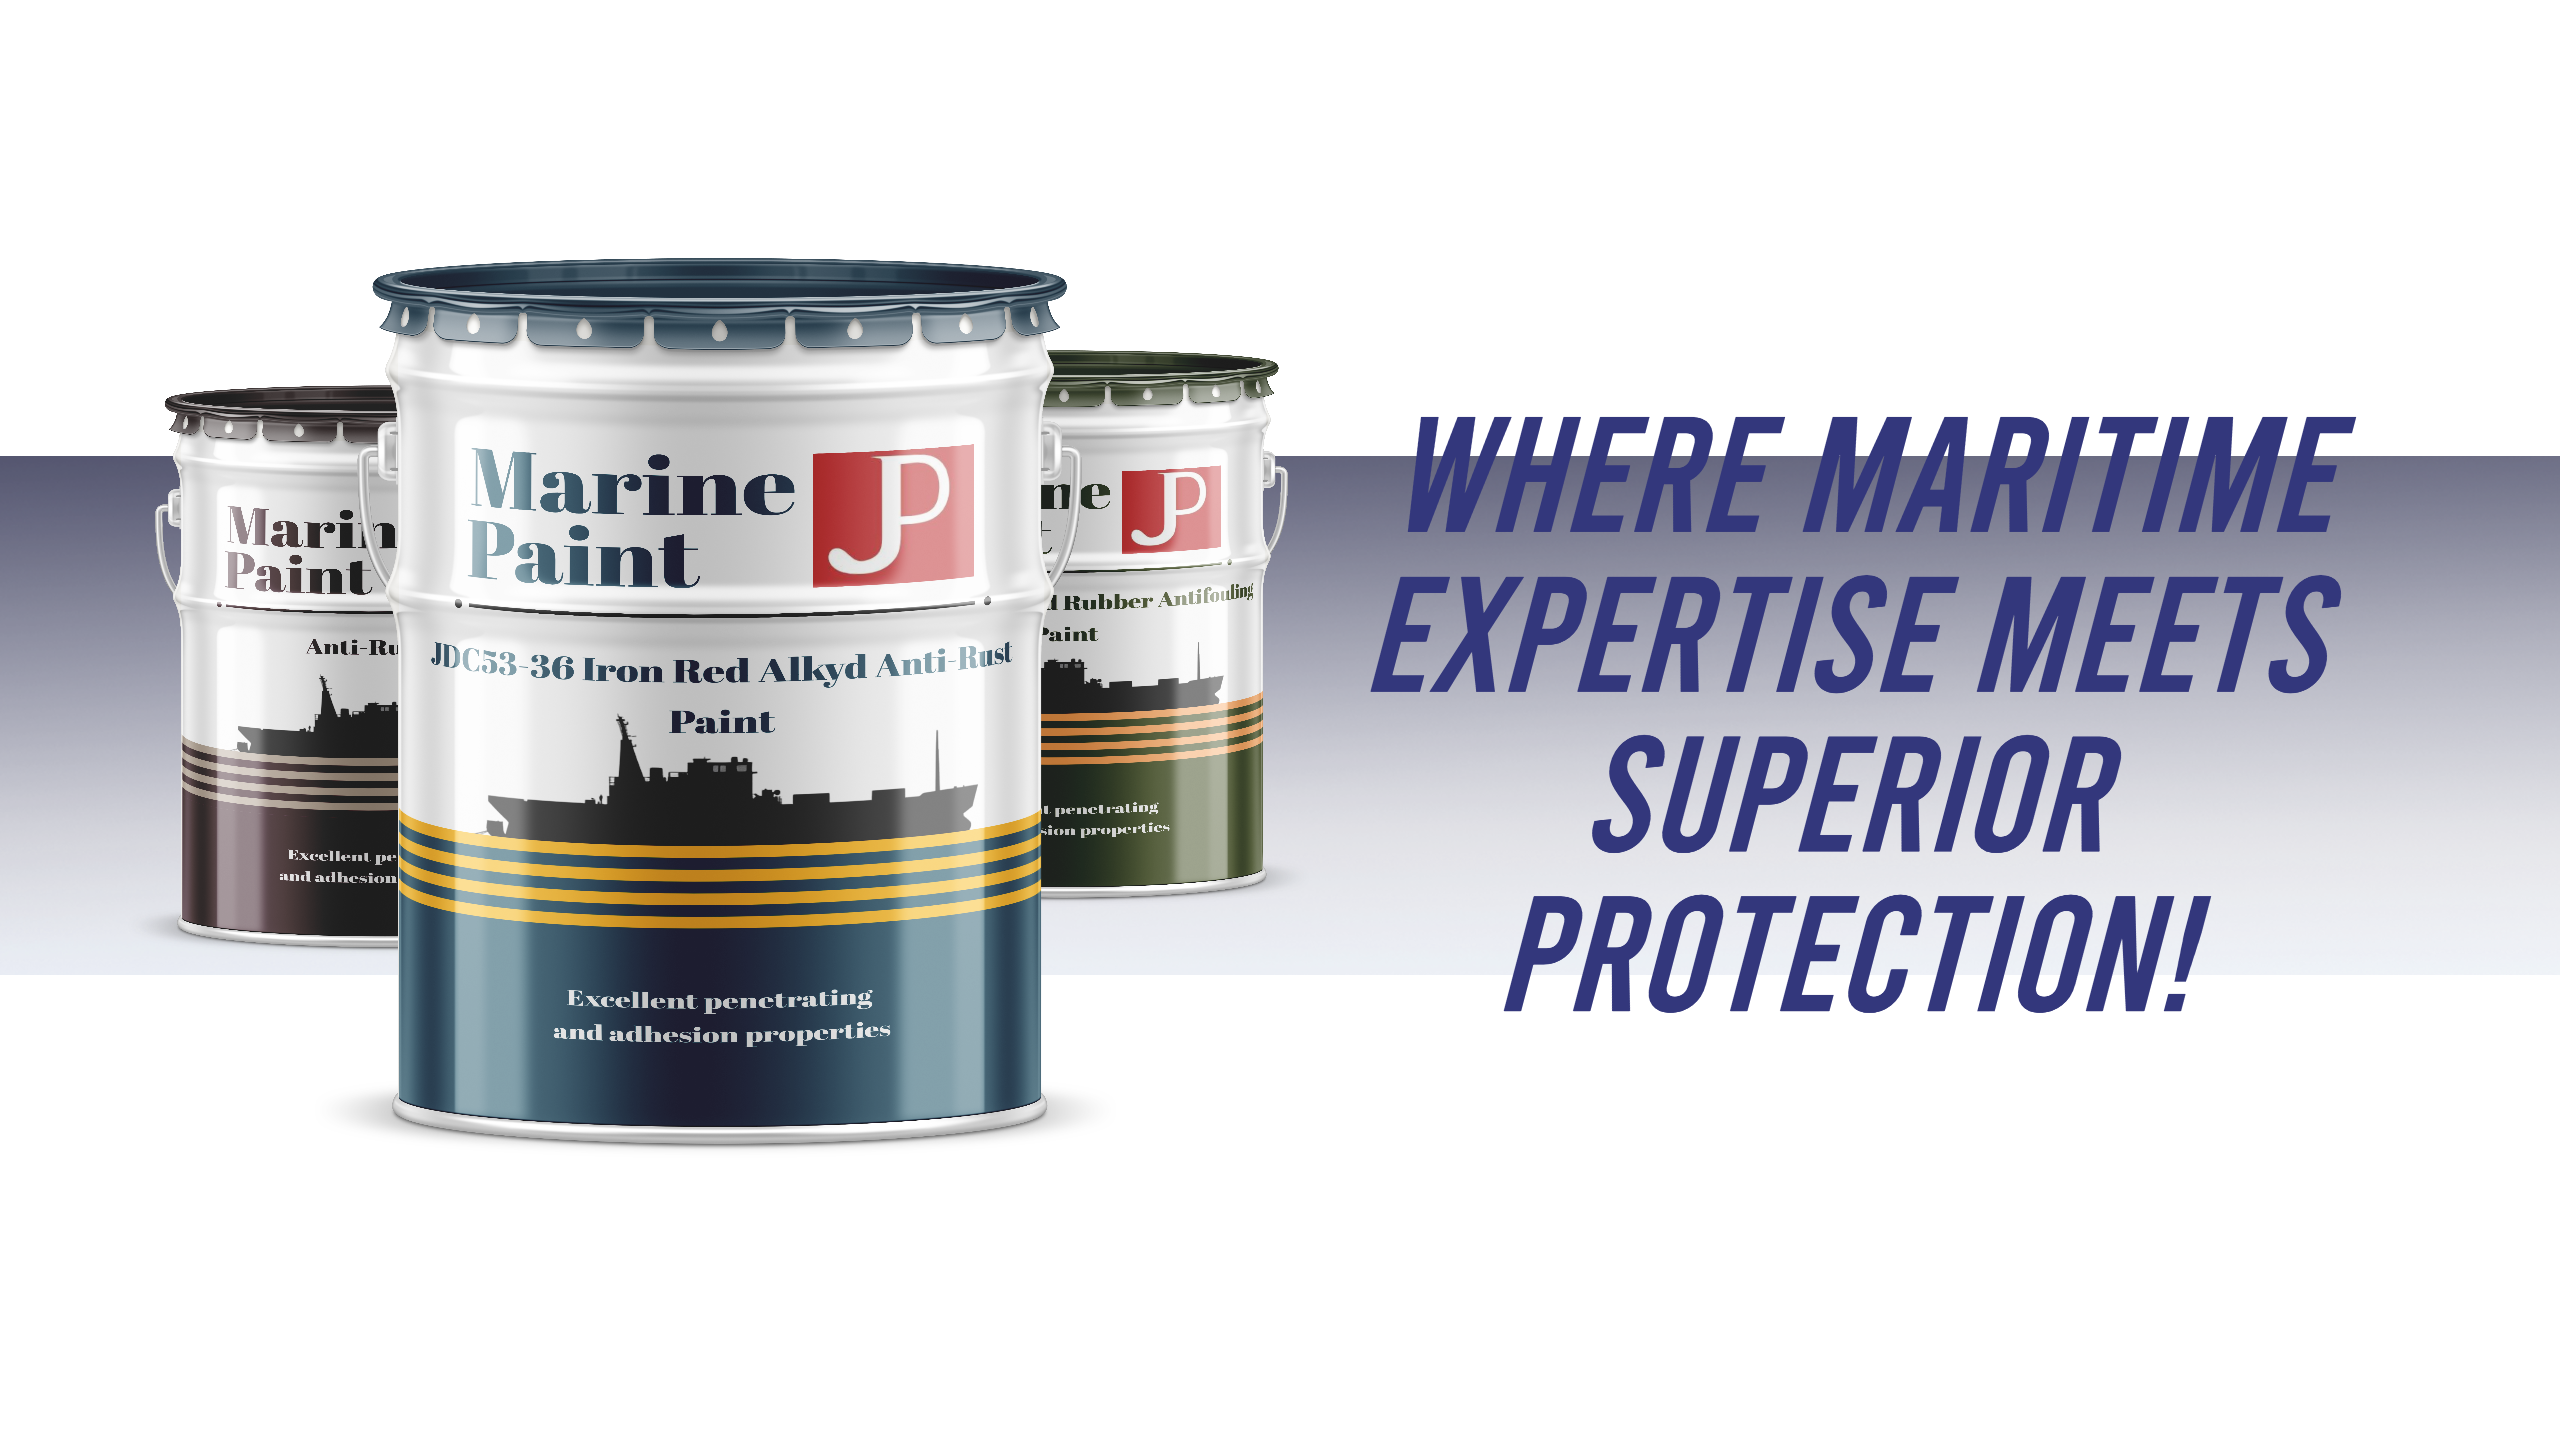
At JDmarine, we pride ourselves on offering a comprehensive range of coatings that cover every need, from initial preparation to the final beautiful finish. We believe in providing a complete system where each product is designed to complement the others.
For example, a typical high-performance system from our line might include:
- The Foundation: Starting with a high-adhesion primer like our JDH819 Epoxy Zinc Phosphate Primer, which provides excellent anti-corrosion properties on steel 5.
- The Intermediate Coat: For added protection and film thickness, an intermediate coat like JDH817 MIO Epoxy Anti-Rust Tie Coat can be used. It contains micaceous iron oxide, which creates a labyrinth barrier against moisture ingress 5.
- The Finishing Touch: To achieve a brilliant, UV-resistant finish, the system is completed with a durable topcoat like our JDFT810 Fluorocarbon Topcoat or the popular JD908 Acrylic Polyurethane Topcoat 151827. These provide the aesthetic appeal and the final shield against weather and UV degradation 1018.
By offering a full range of compatible products—from specialized primers for difficult surfaces to long-lasting antifouling paints like our JD753 Tin-free self-polishing antifouling paint—we ensure that boat owners and shipyards have access to a reliable, professional-grade system designed for maximum protection and longevity 427.
Have You Considered the Essential Safety Precautions?
The chemicals in two-part epoxy paint are powerful and effective, but they are also hazardous. Ignoring safety protocols when working with these materials can lead to serious health problems, including respiratory damage from inhaling fumes and severe skin irritation. The temptation to cut corners on safety to get the job done faster is a dangerous risk that is never worth taking.
Safety is non-negotiable when you apply epoxy marine paint. The two most critical safety measures are wearing the proper Personal Protective Equipment (PPE) and ensuring adequate ventilation 9. Always work in a well-ventilated area, preferably outdoors or in a space with strong airflow. Wear a respirator rated for organic vapors, chemical-resistant gloves, and safety glasses to protect yourself from fumes and splashes. Taking these simple precautions ensures your boat painting project is successful and, most importantly, safe 9.
[Image Placeholder: A close-up, friendly shot of a person correctly wearing essential PPE: a high-quality respirator covering their nose and mouth, safety glasses, and nitrile gloves. The person is looking at the camera with a confident expression, emphasizing the importance and normalcy of safety.]
Have Questions About How to Apply Epoxy Marine Paint?
Even with a step-by-step guide, questions inevitably arise. You might wonder if you can paint over your boat’s old finish, or how long your new paint job will actually last. This uncertainty can lead to hesitation and potentially costly mistakes. Getting clear, expert answers to these common questions is the final step in building the confidence you need to tackle your boat painting project.
To help you move forward with clarity, we’ve compiled answers to some of the most frequently asked questions about how to apply epoxy marine paint. This section addresses the key concerns that boaters, from DIY enthusiasts to seasoned pros, often have. By understanding these nuances, you can better plan your project, select the right products, and ensure a finish that will protect your vessel for years to come.
![[Image Placeholder: A bright, inviting shot of a person holding a paint can and a brush, looking thoughtfully at a boat hull. A question mark icon is subtly overlaid in the corner. The image should convey a sense of inquiry and learning.]](https://jdmarinepaint.com/wp-content/uploads/2025/06/a-bright-inviting-shot-of-a-person-holding-a-pain-4.png "[Image Placeholder: A bright, inviting shot of a person holding a paint can and a brush, looking thoughtfully at a boat hull. A question mark icon is subtly overlaid in the corner. The image should convey a sense of inquiry and learning.]")
What is the best epoxy paint for a boat?
The "best" paint depends entirely on the application area and the substrate. There is no single one-size-fits-all solution.
- For underwater hulls (Boat Bottom Paint): The best system is a multi-coat application of a high-solids, waterproof epoxy primer to act as a barrier coat, followed by a compatible and effective antifouling paint like our JD753 Tin-free self-polishing antifouling paint to prevent marine growth 2127.
- For topsides (Hulls above the waterline, Decks): The ideal system includes an epoxy primer followed by a two-part polyurethane topcoat, like JD908 Acrylic Polyurethane Topcoat 1518. This provides a durable, high-gloss finish with excellent UV resistance to prevent fading and chalking 10.
- For bilges and engine rooms: A tough, chemical-resistant epoxy coating is best to withstand exposure to oil, fuel, and moisture 17.
Can you paint over old marine paint with epoxy?
Yes, but with critical caveats. You can apply epoxy over an existing coating only if the old paint is also a two-part epoxy or polyurethane and is in sound condition (not flaking or peeling) 3. The old surface must be thoroughly cleaned, degreased, and sanded to remove all gloss and create a mechanical profile for the new paint to adhere to. If you are unsure of the old paint type, it is always safest to remove it completely or use a specific tie-coat primer designed to bond dissimilar paint types. Never apply epoxy over a single-part enamel or alkyd paint, as the strong solvents in the epoxy will cause the underlying paint to lift and wrinkle.
How long does epoxy marine paint last?
When the surface preparation is done correctly and the paint is applied according to the manufacturer’s specifications, a high-quality marine epoxy system can last for many years. For a topside finish, you can expect 5-10 years or more of service before needing to repaint, depending on UV exposure and use 13. For an underwater barrier coat, the protection against osmosis can last for the life of the boat if maintained properly. The longevity is a direct result of the quality of the preparation and application 13.
Is marine epoxy waterproof?
Yes, absolutely. One of the core properties of marine-grade epoxy is its exceptional resistance to water ingress . It cures into a dense, non-porous film that acts as a barrier, which is precisely why it is the gold standard for preventing osmotic blistering on fiberglass hulls and corrosion on metal hulls.
What is the difference between marine epoxy and regular epoxy?
While both are two-part systems, marine epoxy is specifically formulated to withstand the unique and harsh conditions of the marine environment. This includes:
- Enhanced Flexibility: To handle the expansion, contraction, and stress a boat hull endures.
- Superior Water Resistance: Formulated to withstand constant submersion in both saltwater and freshwater.
- UV Resistance: When used in topcoat systems, they are designed to resist breakdown from sunlight .
- Specialized Formulations: The marine market includes specialized products like anti-corrosive primers and barrier coats that are not typically found in the "regular" epoxy category.
Conclusion
Properly applying epoxy marine paint is an investment in the longevity, beauty, and value of your vessel. It is a meticulous process, but one that rewards diligence with unparalleled protection.
![]()